SeWhy do we need to scan our infrastructure?
Exposing an IP address on the internet is a massive risk, it is usually going to be attacked after the first five minutes. People may create new ports, sometimes they are aware of that and other times even not. I recommend a weekly scan in order to monitor any possible risk of exposure and to identify possible threats.
The using of PowerShell or Azure REST API is not really effective or enough accurate, we cannot trust a simple of port numbers, we need more.
Even listing the number of ports exposed by any IP is an elaborated operation to do using Azure CLI or REST API. Another point to consider is that some services can be exposed using a not usual port number, for example, RDP is usually on 3389 port but people may change this port to another one.
The best option is a very powerful tool named Nmap in collaboration with Azure CLI.
Nmap is the top tool for scanning and also many other features, you can read more about it here: https://nmap.org or here https://highon.coffee/blog/nmap-cheat-sheet/. Using Nmap we can execute active scanning to any endpoint and collect the real ports open. We can also collect information about the services and more.
Let dig now into the practical: RED TEAM/BLUE TEAM
We first need to install Azure CLI, the MSI distributable is used for installing or updating the Azure CLI on Windows. You don’t need to uninstall any current versions before using the MSI installer. You can download the Azure CLI MSI package from the link below.
After downloading Azure CLI MSI you need to:
- Execute the file azure-cli-2.0.77.msi
- Accept the agreements as below and click the Install button.

The AZ CLI portal provides all the possible functions we can use, see more the link below:
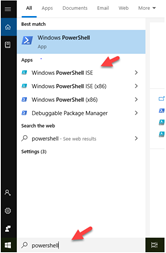
We have now Azure CLI installed, in order to test it we need to open PowerShell ISE.
- Search the PowerShell ISE in Windows search and click on Windows PowerShell ISE, see the picture below.
- In the console, panel write the Azure CLI command
az login
- Click on File > Save and name the file, Scan Azure IPs.ps1, now click on the green run button to execute the command.

- The command will open the browser, log in to Microsoft Azure, click on the account.
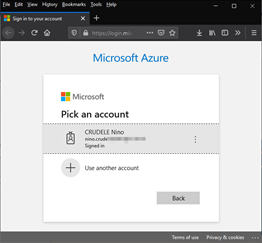
Perfect, we have installed azure CLI and we can now write our script.
The script below collects all the public IP addresses in all the subscriptions and it executes an Nmap scanning.
Write-Output "Login into the Azure Account"
az login
#Variables
$ipListFileInput = "C:\" + $subscriptionName + "_ipList.txt"
$ipListFileOutput = "C:\" + $subscriptionName + "_ipListoutput.txt"
Write-Output "List subscriptions"

#Filtering the output
$allsubscriptions = az account list --query '[].[id, name]' -o tsv

#Cycling for each subscription
foreach ($subscription in $allsubscriptions) {
   $arrValues = $subscription.Split("`t")
   $subscriptionId = $arrValues[0]
   $subscriptionName = $arrValues[1]

   Write-Output "Get IP for subription id " + $subscriptionId.ToString()
   $allPublicIP = az network public-ip list --subscription $subscriptionId --query '[].[ipAddress]' -o tsv

   #Create the empty array for ips
   $OutputArray = @()

   #Cycling for each ip
   foreach ($ip in $allPublicIP){
      $OutputArray += $ip
   }

   Write-Output "Write to file"
   [System.IO.File]::WriteAllLines($ipListFileInput, $OutputArray)
   Write-Output "Execute the scan"
   nmap -v -p 1-65535 -sV -O -sS -T5 -iL $ipListFileInput | Out-File $ipListFileOutput
}
Let make some important considerations regarding the script above. Something I really like about Azure CLI is the possibility to query the data, check the line below.
$allsubscriptions = az account list --query '[].[id, name]' -o tsv
This Azure CLI command list all the subscription where the account has access and we extract the id and the name only.
We save all public IP found using the command below
[System.IO.File]::WriteAllLines($ipListFileInput, $OutputArray)
It is important to know that the command WriteAllLines will write a file without the Byte Order Mark on top, something the other PowerShell commands do.
I can now execute a massive scan of the IP addresses using the Nmap command -iL and the file created.
nmap -v -p 1-65535 -sV -O -sS -T5 -iL $ipListFileInput | Out-File $ipListFileOutput
The Nmap command prints a verbose output and it runs a stealth syn scan with T5 timing with OS detection, and the scan result will be saved in a file.
Below an example of an output file created by the scan.

We can use these mixing techniques between PowerShell and other hacking tools in different combinations. The important thing to understand is that the use of hacker tools is not more important than the use of our abilities in scanning the azure infrastructure.
Tools like Nmap, Metasploit or SQLMap and many others don’t have any real capability of scanning at the infrastructure level.
The hacking tools usually don’t implement any Azure capabilities, we need to mix tools, code and scripting techniques to be realistically effective. We first scan the infrastructure to collect the endpoints and we use the specific hacking tool to scan each endpoint found.